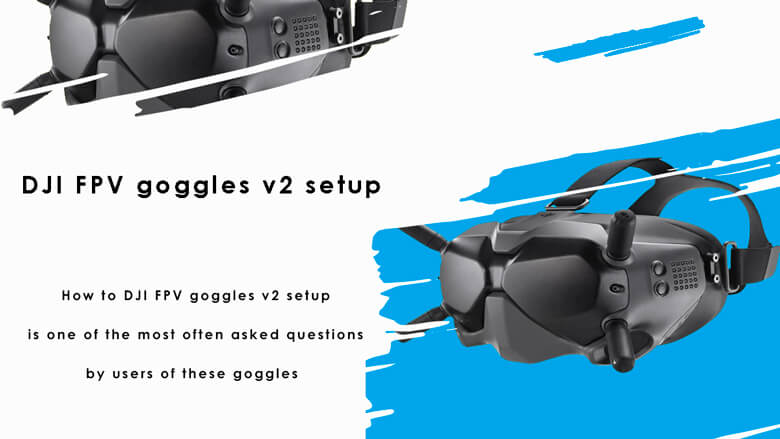
DJI FPV goggles v2 setup
Many organizations have joined the Drone manufacturing sector now that Aircraft has taken on a particular position in people’s lives and enterprises.
DJI, one of these Chinese firms, has invented and built a new generation of drones known as FPV, or first-person vision. This technique is accomplished by using DJI FPV goggles, which are exceptional.
With these goggles, you can view the whole environment in which the drone is flying as if you were inside the bird and in charge of guiding and controlling it.
How to DJI FPV goggles v2 setup is one of the most often asked questions by users of these goggles.
We’ll show you how to activate DJI FPV goggles in the following sections.
How to activate DJI FPV goggles v2?
DJI’s goggles are compatible with a broad range of Aircraft. All that is required in the first step is to activate DJI FPV goggles.
You must first connect goggles to your airplane and check that the goggles, bird, and controller are fully charged.
So, if your goggles have no charging, take action to do so. You must also activate your device’s remote control in addition to the Aircraft.
In this step, it’s essential to keep in mind that the controller must be connected to the bird.
Now it’s time to activate DJI FPV goggles v2:
- To begin, put on the goggles and go to the main screen. Look for the tools option in the shape of a toolbox and choose it.
- Then pick the setting option or the same setting, and check for the linking Setting option or the same connection settings in the menu that appears, then choose it and enter.
- Select the option for rapid connecting now.
- Select the option for rapid connecting now.
- Finally, choose the option to Confirm.
- To complete this stage, push the connection button on your airplane and then pick the confirm option presented on the goggles to complete the connection.
Note: You can quickly check the manual of these goggles to discover what kind of drones they support and can be hooked to. (Click to download)
DJI Goggles V2 Setup video tutorial:
How to connect goggles to Aircraft to activate DJI FPV goggles v2?
Attaching goggles to the bird is one of the crucial phases inactivate DJI FPV goggles v2.
read more:
The best battery for DJI FPV goggles
How to charge DJI FPV goggles battery?
Follow along as we walk you through the steps to do this:
| Activate DJI FPV goggles v2 by attaching goggles to the bird | |
| 1 | Press the connection button on the goggles in this phase. You should hear a buzzer after that. |
| 2 | For 5 seconds, press and hold the Drone power button. The battery level LEDs will flash, and a buzzer will sound. |
| 3 | It is now sufficient to wait for the goggles and the Aircraft to link for 5 to 30 seconds. |
| 4 | The bird battery LEDs are fixed at this point and display the battery level. |
| 5 | The goggles have stopped buzzing. The live view that the camera displays is now imprinted on the goggles, as you can see. |
As you can see, activating the goggles and connecting them to your bird is simple. Learn how to start DJI FPV goggles in the remainder of this post.
Activate the DI FPV goggles
The user can activate the DJI FPV goggles in two ways:
- Activation with the assistance of DJI Assistant 2.
- Activation with the help of DJI Go 4.
- Activation with the assistance of 2 DJI Assistants
Follow these procedures to start and activate the DJI FPV goggles v2 with the aid of DJI Assistant 2:
- Go to the Goggles area of the DJI website first.
- In this step, choose DJI Assistant 2 software from the downloads area and execute it when downloaded and installed.
- You must now log in with your username and password.
- After logging in, put on your glasses, choose the language you wish to use, and click Next.
- Now read the terms of service that have been presented to you carefully, and then tick the box that has been displayed to you. In reality, by checking this, you indicate that you have read and accepted the terms of the agreement and then click Next once again.
- In this phase, you’ll be prompted to choose an activation method, which we’ll go with the first choice, which is activated with the assistance of two DJI Assistants.
- Click Next once again and wait a few moments. A USB cable will be required to connect the glasses to the computer.
- After you’ve connected, you’ll see an icon called DJI Goggles appear on your screen.
- A pop-up activation box will appear, and you must select the Start Activation option.
- Select the confirm Account option in the following stage to affirm that this belongs to you and you wish to activate it.
- You will see a page with the statement Activation is complete, which indicates that the activation has been performed successfully.
read more: Can you use dji fpv goggles with Mavic?
- Activation with the assistance of DJI Go 4
Follow these procedures to start and activate the DJI FPV goggles v2 with the aid of DJI DJI Go 4:
- Turn on the AirCraft and the controller. Now double-check and make sure they’re linked in the first step.
- Then open the DJI Go 4 app and sign in with your account information.
- Make sure you go through steps 2–4 in the preceding section again. In step 4, choose the second option, which is with a mobile device, and then click Next.
- A timer and the words Linking DJI Goggles will appear on the screen.
- On AirCraft, press the connect button and wait for the Complete connecting message to show.
- To begin an activation, click Complete and then Confirm.
- Click Next and read the regulations before checking the box and clicking I Agree.
- Next, you must validate your account before clicking Activate.
- As you can see, the activation is complete, and the success message appears on the monitor.
Finally,
As you can see, we went through how to activate DJI FPV goggles and DJI FPV goggles v2 setup throughout this post. We hope you find the lessons and information helpful and that you can connect the goggles with the help of the content properly.

